Unlock the Power of Multilingual Websites for SEO Dominance
Multilingual websites offer a multitude of benefits that can propel your online presence to new heights.
From driving increased website traffic and boosting sales to establishing a strong brand identity and instilling trust in your audience, the advantages of going multilingual are truly transformative. As the demand for multilingual websites continues to soar, businesses are increasingly embracing this cost-effective strategy to enhance their online presence.
Today, we will delve into the process of creating a multilingual website in Joomla 4, utilizing the powerful Helix Ultimate template framework. Follow our comprehensive guide closely, and you'll have your multilingual site up and running in no time.
Step 1: Installing the Required Languages
Before embarking on your multilingual journey, you must install the languages you want your website to support. Here's how you can do it:
Log in to your Joomla administration control panel.
Navigate to System > Install > Languages.
Select the languages you desire and click Install.
For this tutorial, we'll install Arabic, Chinese Simplified, and Finnish languages while keeping English as the default language.
Upon successful installation, you'll see a message confirming the language pack installation.
Step 2: Enabling Content Language
Now that you've installed the languages, it's time to enable them. Follow these steps:
Go to System > Manage > Content Languages.
Select the languages you installed and choose 'Publish' from the Actions drop-down menu.
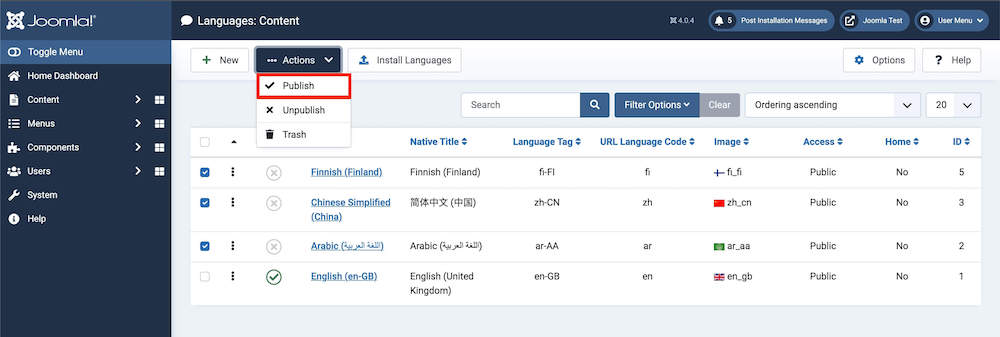
After publishing, you'll receive a confirmation message indicating that the content languages have been published.
Step 3: Installing the Language Plugins
To enhance your website's multilingual capabilities, you'll need to install the Language Filter and Language Code plugins. These plugins help your CMS recognize the installed languages and improve SEO for your HTML documents. Here's how to enable them:
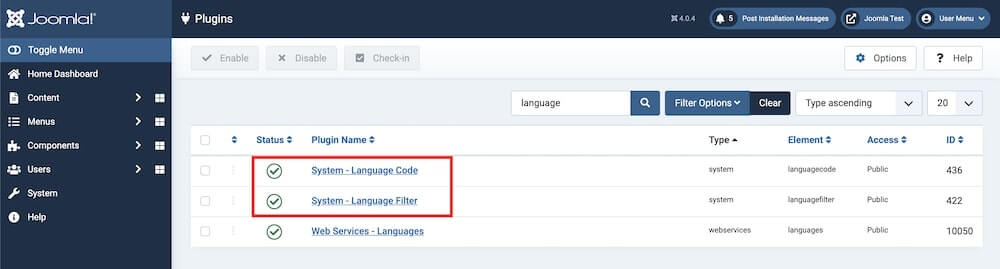
Navigate to System > Manage > Plugins.
In the search bar, type "Language" and hit Enter.
Enable both the Language Filter and Language Code plugins from the list.
Step 4: Assigning Languages to Specific Pages
Now, let's create copies of web pages for your supported languages. For this tutorial, we'll demonstrate using the Legacy Home page of Helix Ultimate. Follow these steps:
Go to your Joomla Dashboard and access Components > SP Page Builder.
Select the Home - Legacy page from the list.
Save as Copy" from the dropdown menu associated with the Save button.
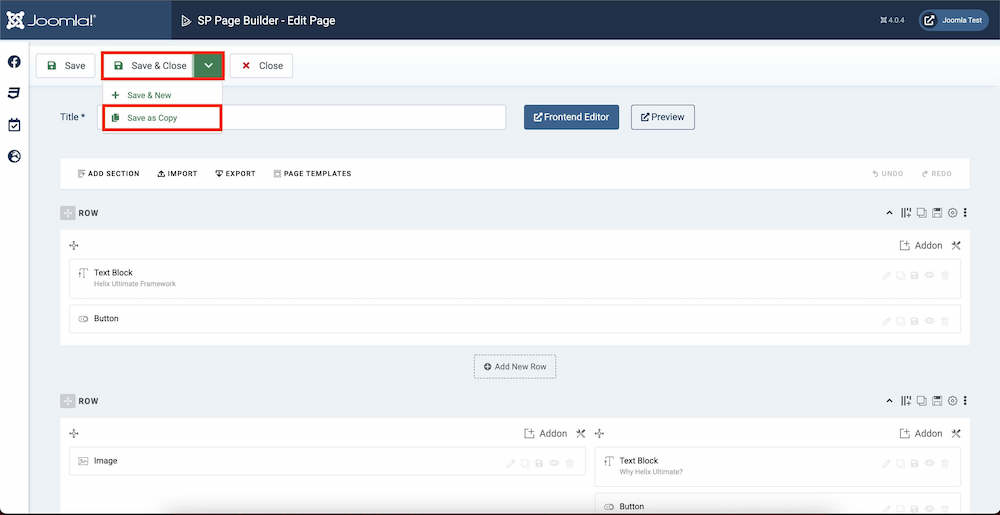
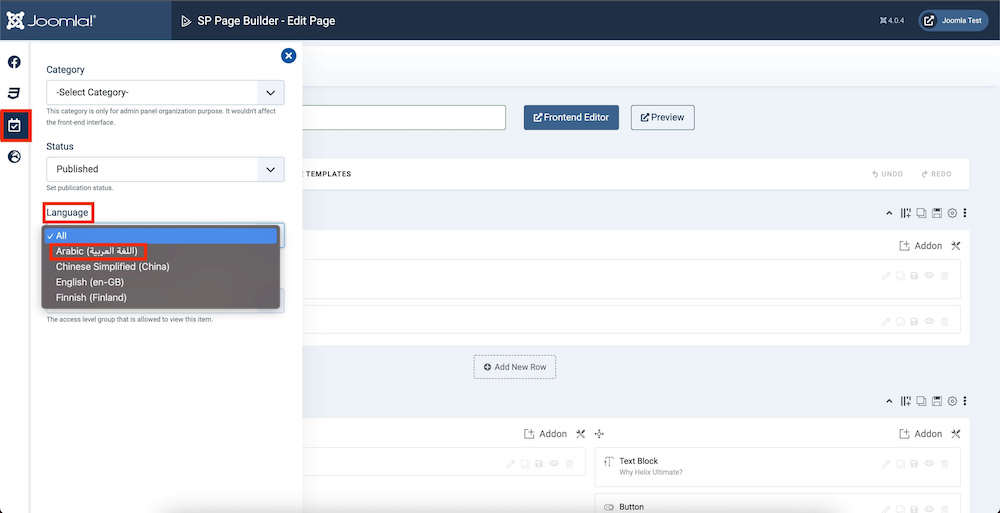
Repeat this process for each language you've installed, creating separate copies for English, Arabic, Chinese, and Finnish. To assign a language, simply edit the page and choose the appropriate language from the Language dropdown list in the Publishing tab.
Step 5: Setting Up Menus for the Multilingual Site
To ensure smooth navigation and control over your multilingual website, you'll need to create menus for each supported language. Here's how:
Access the Menu option from your dashboard and choose 'Manage.'
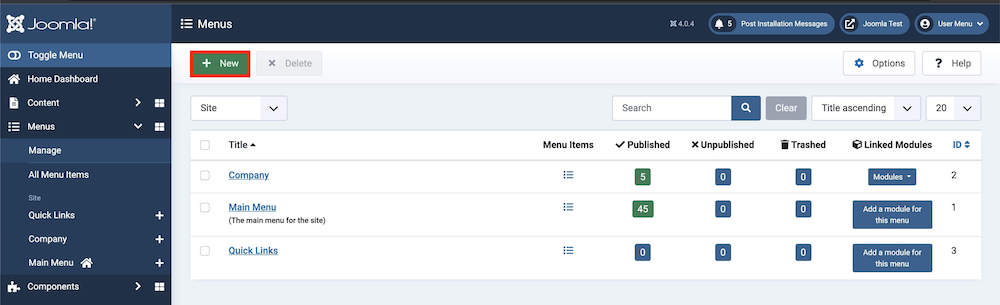
Click the 'New' button.
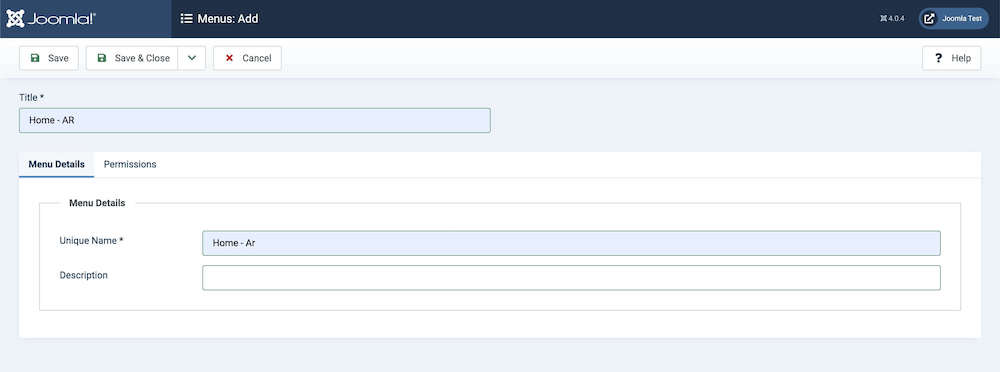
For the Arabic menu, set the Title as "Home - AR" and the Unique Name as "Home - Ar." Then, click 'Save & Close.'
Repeat this process for the other languages you've installed.
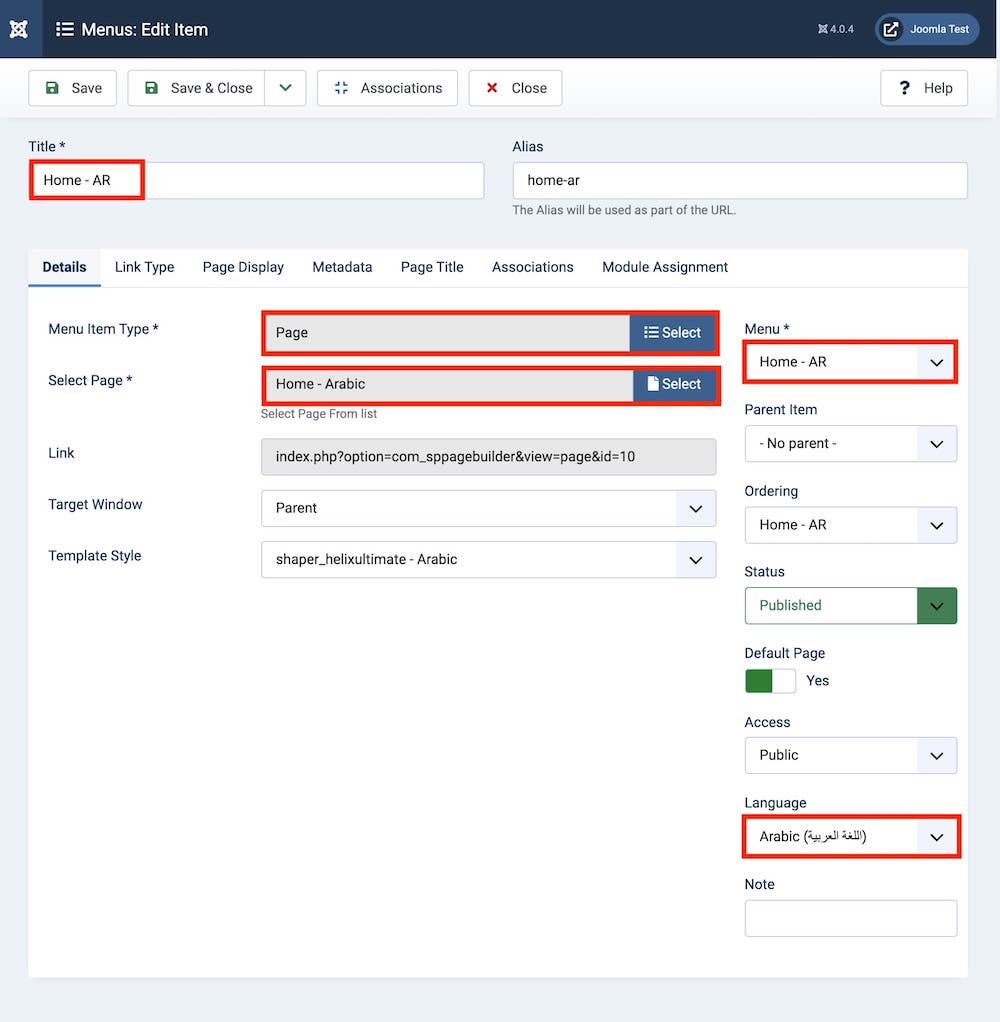
Step 6: Adding Menu Items for the Languages
Now that you've created menus, it's time to add menu items for each main menu. Follow these steps:
Go to Menus and select the respective menu you've created.
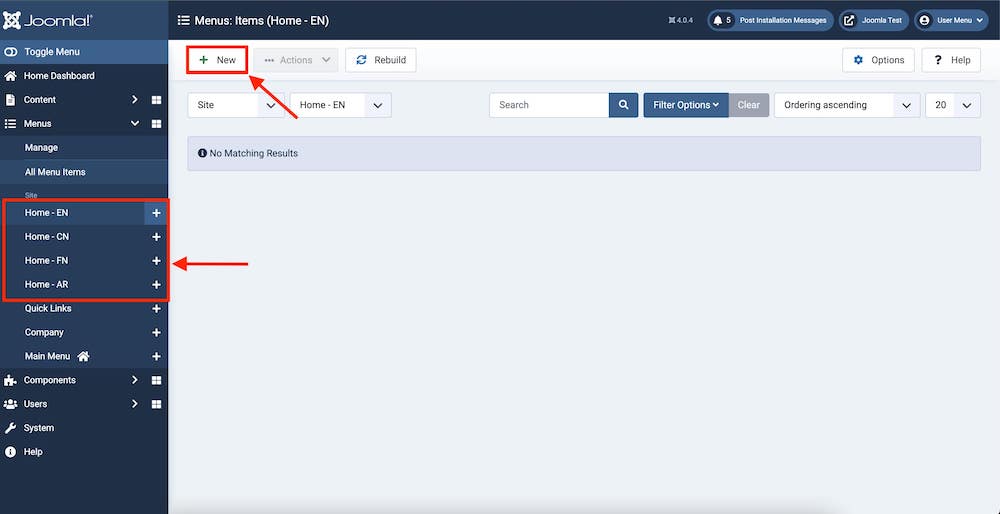
Create new menu items for each language by specifying the Title, Menu Item Type, Select Page (corresponding to the language), and Language.
- Once you've configured the settings, click 'Save & Close' for each menu item. To set the default Home item for Arabic language pages, click on the "Set As Home" button as shown in the screenshot.
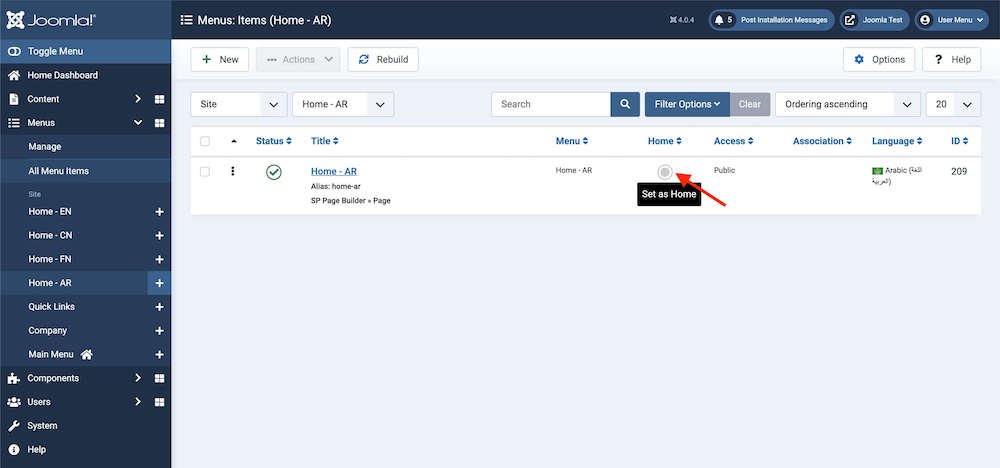
Click on this Set As Home button shown on the screenshot above for the language flag to appear. This will become the default Home item for Arabic language pages.
Step 7: Menu Association via the Menu Item
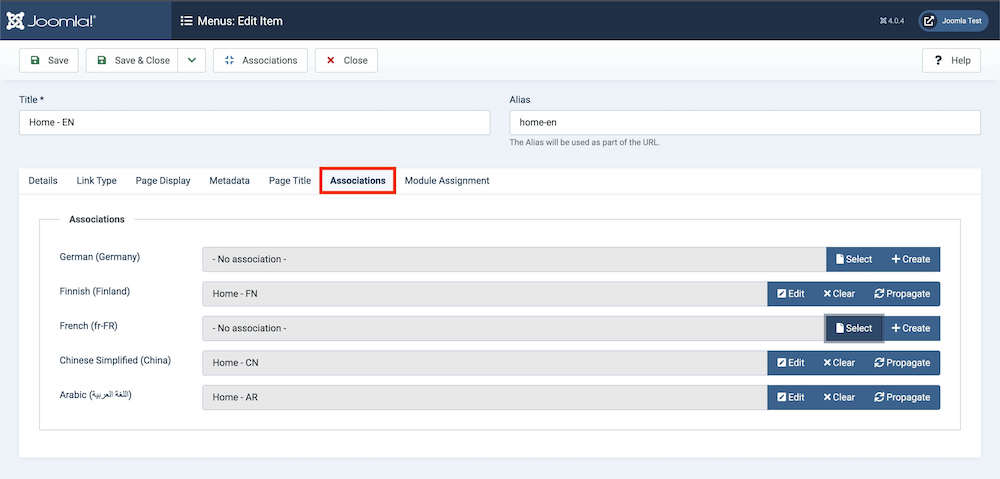
After adding menu items and assigning languages, navigate to Menus > Site to find the Associations tab. Here, select the menu items for the associated languages you've created.
Step 8: Enabling the Language Switcher Module
To enable seamless language switching for your users, activate the language switcher module. Here's how:
Go to Content > Site Modules > New.
Select the Language Switcher module.
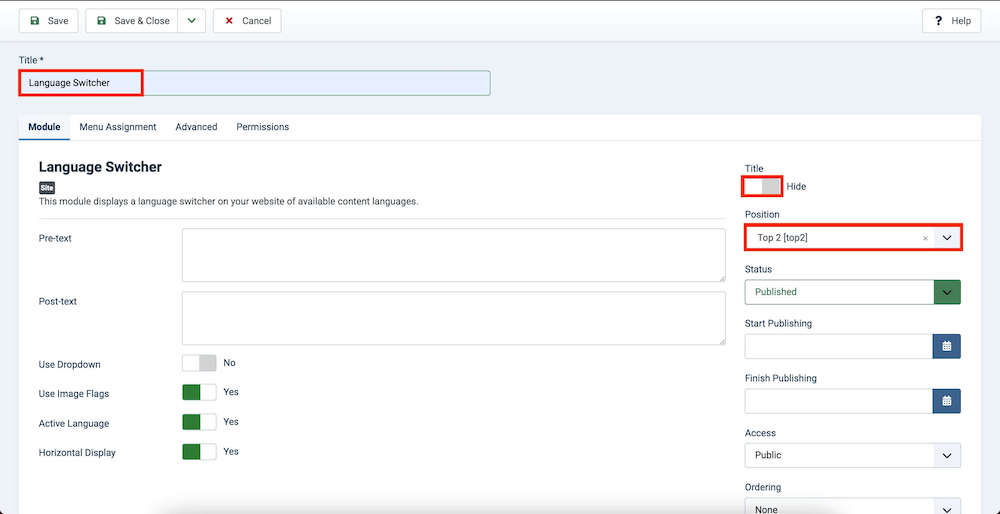
Once added, configure the module settings, including renaming the Title and choosing the Position. Then, click 'Save & Close.'
Step 9: Duplicating Template Styles
For a consistent look and feel across your multilingual pages, you'll need to duplicate your Helix Ultimate template for each language. Follow these steps:
Navigate to System > Templates > Site Template Styles.

Select the default template and click 'Duplicate.'
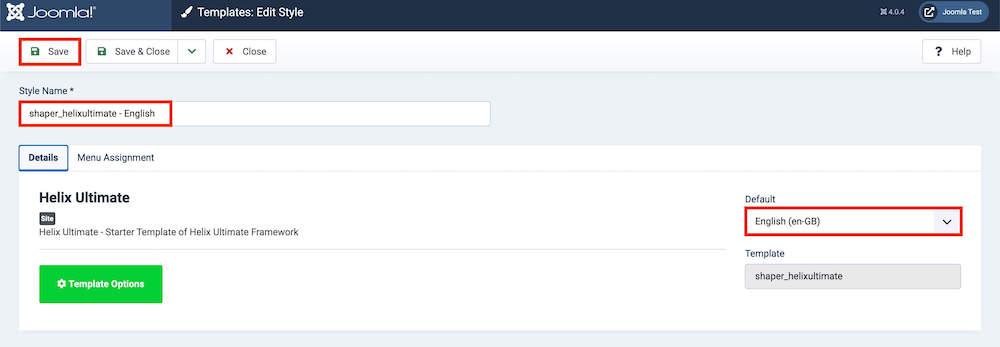
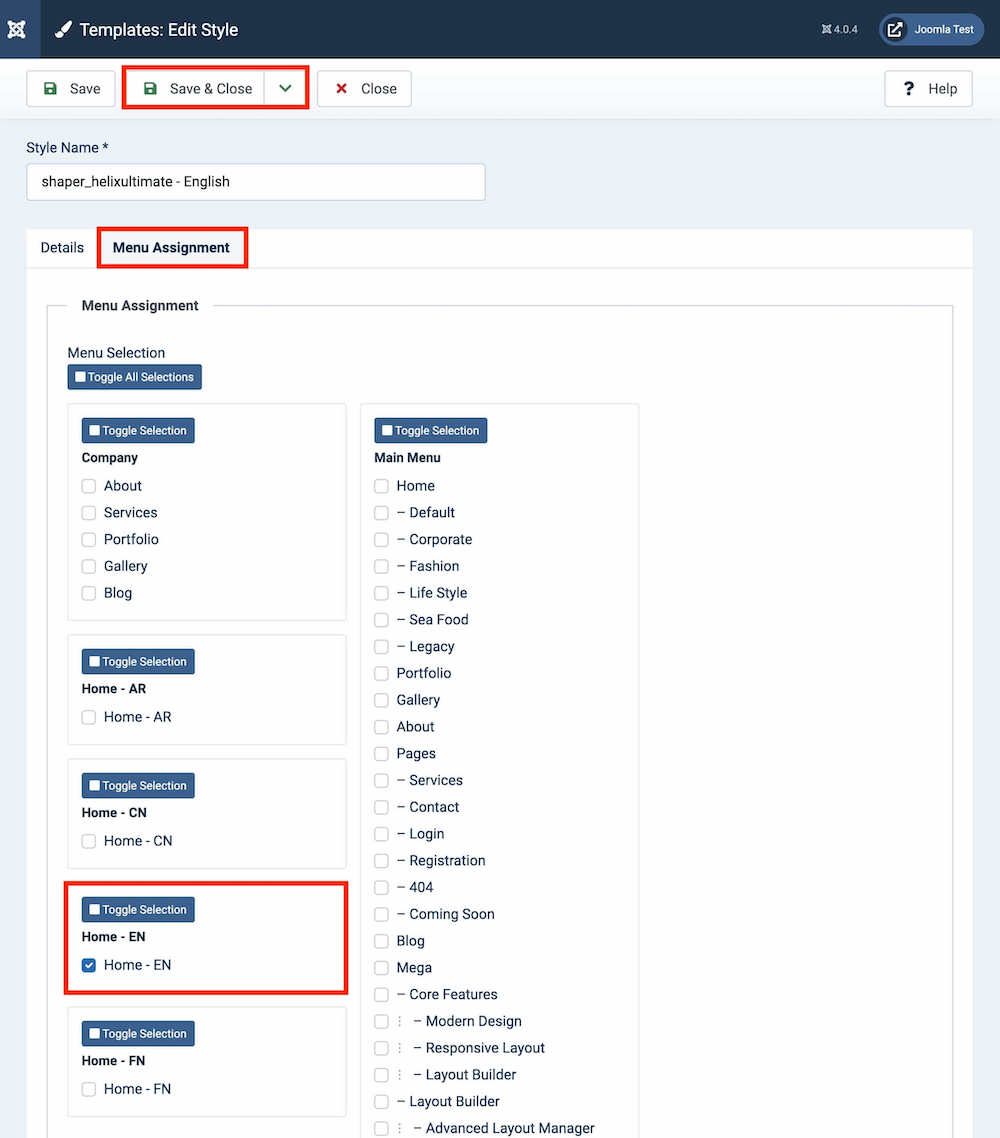
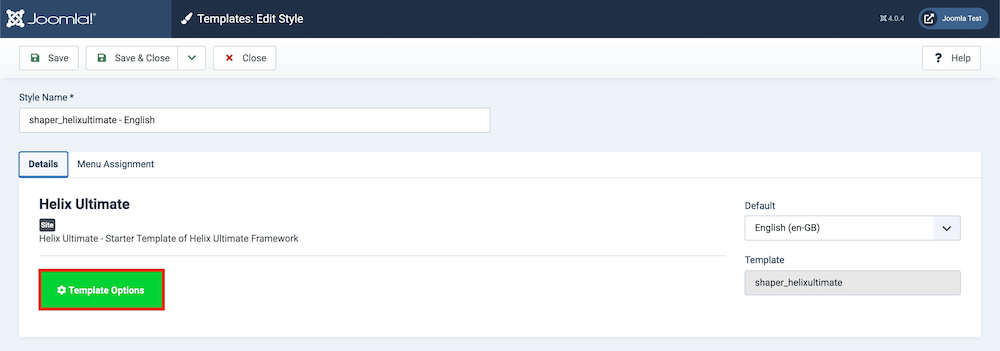
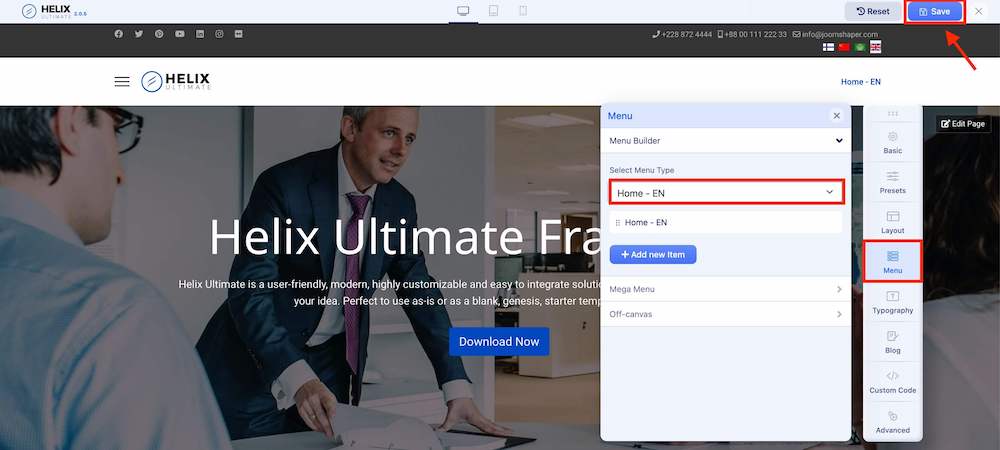
After duplication, assign languages to each template by renaming them and selecting the respective language menu in the Menu Assignment tab.
Step 10: Content Localization Method
Please note that while the previous steps provide a structure for multilingual content, actual content localization will still require manual effort. Follow these steps:
Access Components > SP Page Builder from your Joomla 4 dashboard.
Locate the home pages created in Step 4.
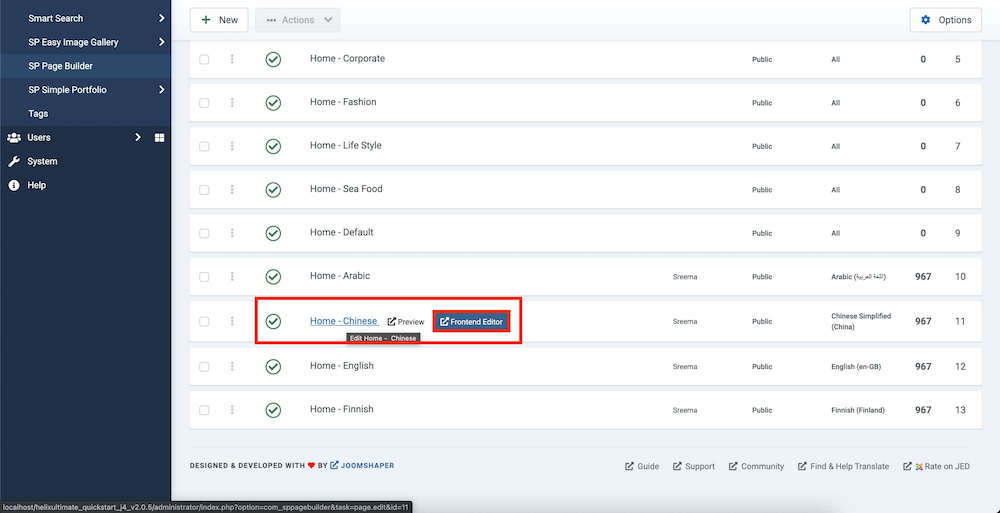
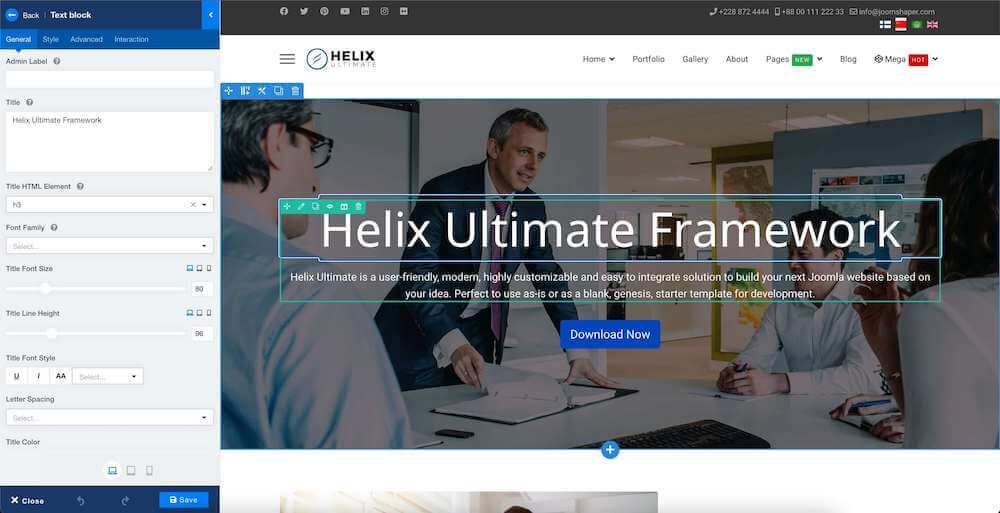
Use the Frontend Editor to localize your webpage content as desired.
Congratulations! By following these steps, you've successfully created a multilingual website in Joomla 4 using the Helix Ultimate framework. This strategic approach enhances your website's reach and accessibility, catering to a global audience while boosting your SEO rankings.
