What is Photoshop AI Generative Fill?
Photoshop's AI-driven generative fill feature is a potent tool that empowers you to seamlessly populate, alter, or eliminate image components with minimal effort.
Fueled by the capabilities of machine learning AI, it swiftly generates segments of images, or even entire composite pictures, in a fraction of the time it would require more time for a human to accomplish the same task. Through a meticulous analysis of each pixel within an image, it harmonizes lighting, perspective, coloring, and shadows, yielding an extraordinarily lifelike artistic output. This non-destructive utility offers the convenience of effortless reversibility for any undesired alterations, as it meticulously organizes each generated element into its dedicated layer, complete with a layer mask. Consequently, you can refine and adapt your creations using any of Photoshop's other tools, including blending modes and filter effects. What's even more remarkable is that it seamlessly integrates with your preferred Photoshop keyboard shortcuts.
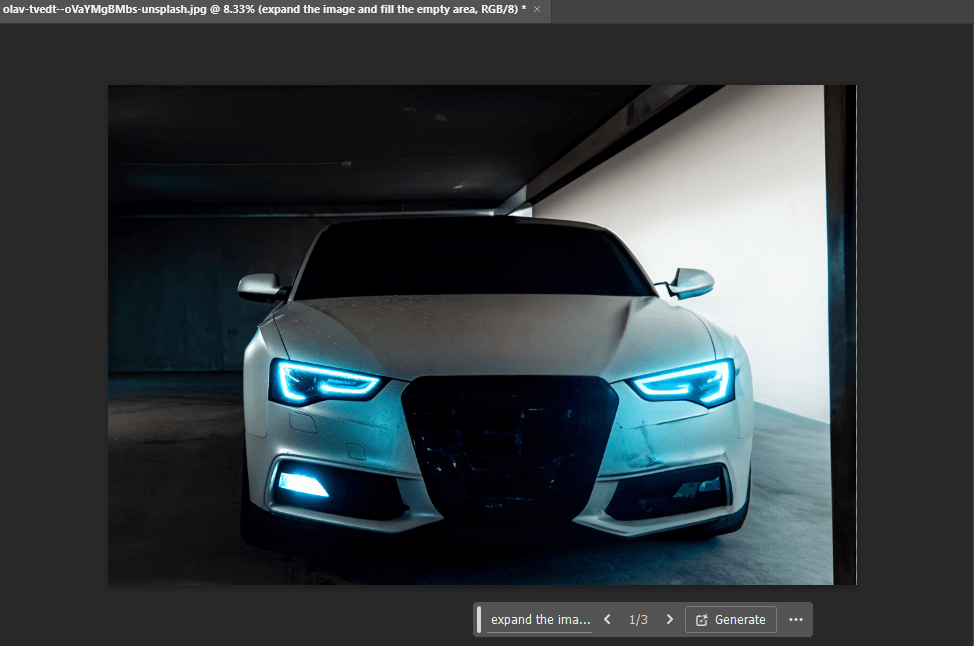
Extend Images With Photoshop AI
Utilizing the image from the preceding section, we will address the vacant regions on our canvas. To accomplish this, opt for the rectangular marquee tool to create a selection around the perimeters of our canvas. While doing so, hold down the shift key to enable multiple selections, and subsequently, move these selections over the white portions of the image. Ensure that the selection extends to incorporate some of the original image pixels. Lastly, initiate the generative fill action.
You'll observe that the generative fill toolbar displays an input box for text prompts. In this specific case, we won't be inputting any text. By keeping it empty, Photoshop AI will analyze the image pixels and expand them within your selected region. Click on the generate button to execute the fill operation.
Following the generative fill operation, this is the appearance of our image (shown below the passage). After employing generative fill, you'll have three alternatives at your disposal, accessible within the generative layer properties. As mentioned previously, Photoshop generates a fresh layer with an accompanying mask, preserving the integrity of your original image. If the results do not meet your satisfaction, you can click the generate button again, providing you with three new alternatives. This process can be repeated as many times as needed to achieve your desired outcomes. Delete any discarded variations to manage the file size efficiently.
The below image is an sample before extending.

The below image is after extending :
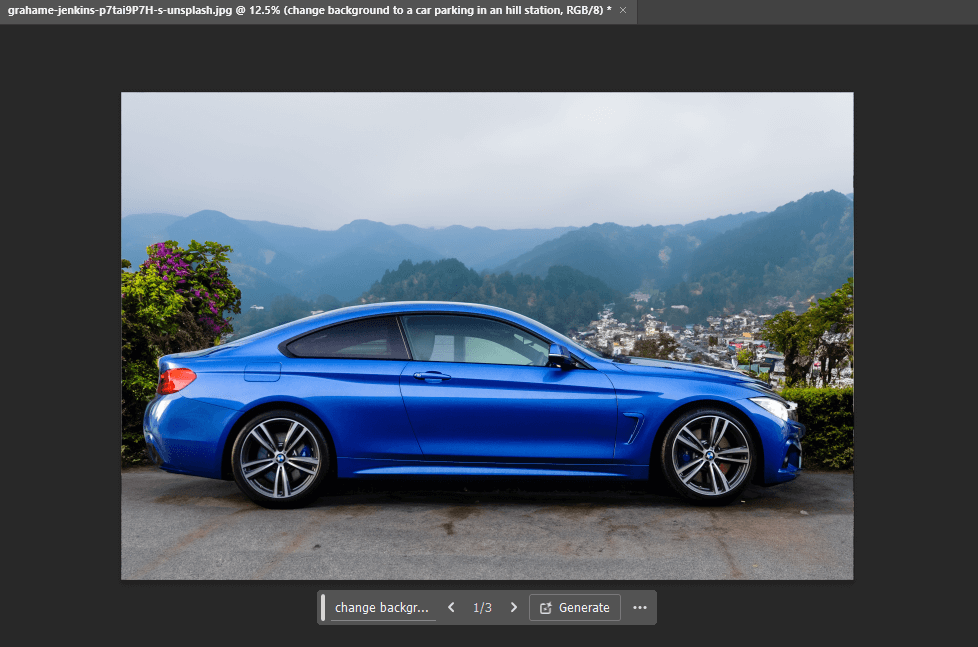
Generate Backgrounds with Photoshop AI
Furthermore, aside from expanding the image area of your canvas, you have the option to employ generative fill to substitute backgrounds within your images. In this stage, we will remove the backdrop from our car image and supplant it with a representation of the salt flats in Utah. To begin, it's important to ensure that nothing is currently chosen. You can employ the select subject button for our image, although the choice of selection tools may yield superior results depending on the image you opt for.
Once you have your subject chosen, proceed to activate the invert selection tool. Make any necessary adjustments to the selected area, and subsequently activate the generative fill feature.
Upon the appearance of the text prompt, input the background scenery you desire to incorporate. In this instance, we've employed the Utah salt flats. Following this, simply activate the generate button.
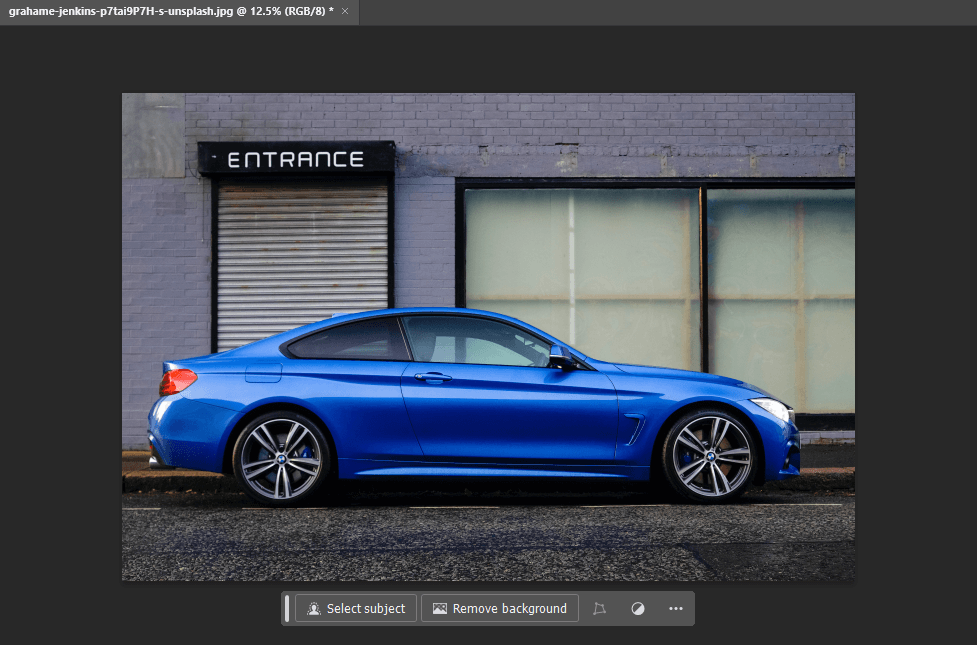
The below image is an sample with default background :
The below image is an sample after changing the background of the above image using AI :
Remove Objects With Photoshop AI
Another impressive capability of Photoshop's AI-driven generative fill is its capacity to eliminate objects from your photos. Suppose you possess a flawless image with a few imperfections. Through the power of AI, Photoshop can erase elements from your image and seamlessly fill the gaps with surrounding pixels from the photograph. This may appear reminiscent of the content-aware tool, but it surpasses it by far. Instead of producing a blurred, peculiar result, the substituted portions of your image blend in so seamlessly that distinguishing them is nearly impossible.
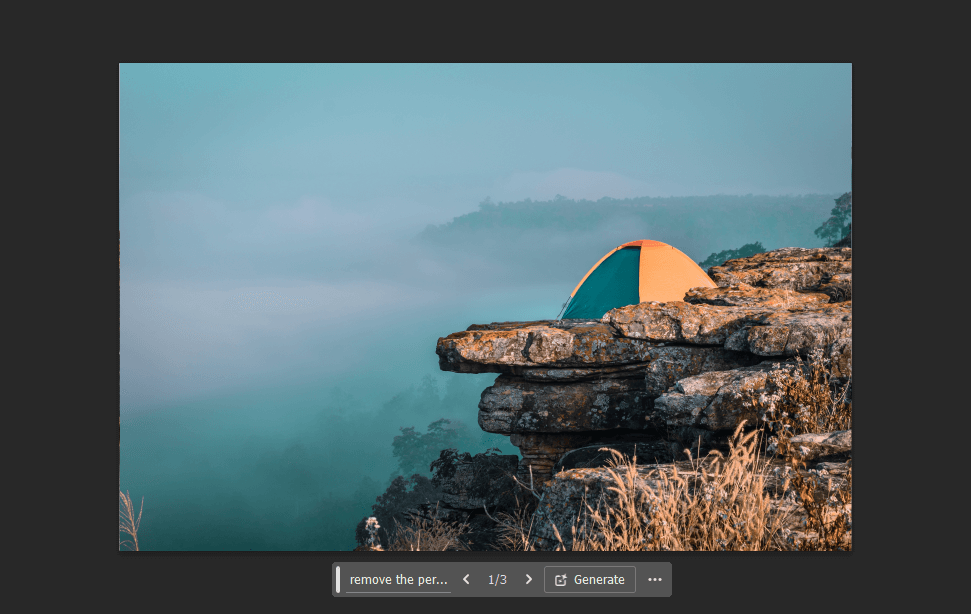
To illustrate, let's consider the desire to remove the man in this photograph (shown below the passage). Utilize the lasso tool to create a selection around the man, then select the generative fill option and proceed to generate. This instructs Photoshop to substitute the contents of the selection with the surrounding pixels from the image. Make sure to keep the text prompt empty unless you wish to insert something in place of the removed object.
Photoshop excels at erasing the man, leaving no trace as if it had never been there.
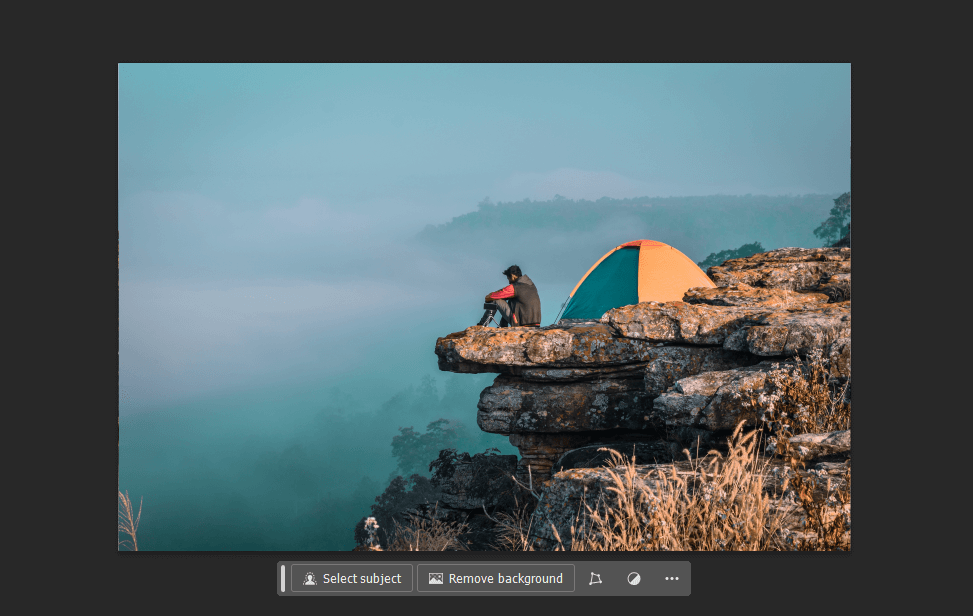
The below image is an sample image :
In the below image we have removed the man sitting on the hill :
Ultimately, you can also add an object, in below image we have added a lion on the mountain :

